Integrating Salesforce with Heroku Connect
Big Goal
In this section we’ll connect our sample application to our Salesforce data.
- With the application running locally, go here
- View the listing of all companies in our database
- Let’s replace this with a listing of companies from our Salesforce
Accountdata
Introducing Heroku Connect
Your organization has great data in Salesforce. But you want to build consumer-facing web applications using Java, Python, JavaScript, and Ruby and host them on Heroku.
There are many ways that Java applications can interact with Salesforce data. One options is to use the Force.com REST or SOAP APIs. Instead, let’s experiment with a new offering, Heroku Connect, which uses background sync through PostgreSQL to shuttle data to and from Salesforce.
Connect Syncs Data
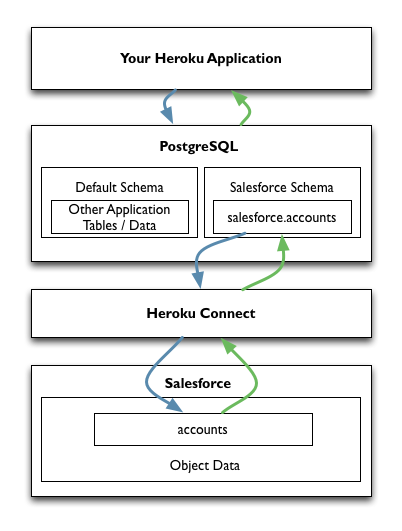
Heroku Connect creates a sync between your Salesforce data and your Heroku application’s PostgreSQL database. That can be a…
- Read-Only one way sync where data flows from Salesforce into PostgreSQL
- Read/Write where data travels both ways
Conceptually it works like this:
Availability
Heroku Connect is a brand new feature that’s being released in the first half of 2014. But today we can take a look at how it works.
If you’d like to discuss it more and apply to be a beta partner, email Margaret Francis.
Setting up Connect
Setting up Heroku Connect is straightforward and takes just a few minutes.
Provision the Addon
From the application directory we can install it like any other add-on.
Terminal
$ | |
NOTE: Unless your Heroku account has been approved for early access to connect, this step will fail.
Web-Based Setup
Run the open command as instructed:
Terminal
$
| |
And it’ll start the web-based setup.
Database
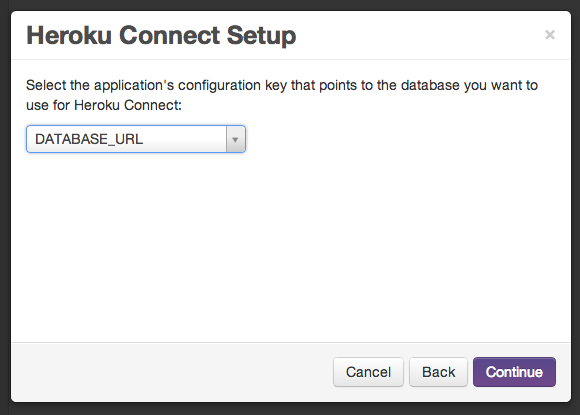
First, you’re asked to select the environment variable that has the address of your current PostgreSQL database. Typically this is DATABASE_URL.
Schema
Next you’re asked to create a schema. If you’re not familiar with them, schemas are a way to create a grouping of tables in your database. You don’t want Connect accidentially clobbering existing tables that you have now or might add in the future, so it’s a good practice to use a schema. Then all your Salesforce data will be collected together.
The default schema name is salesforce which we’ll stick with.
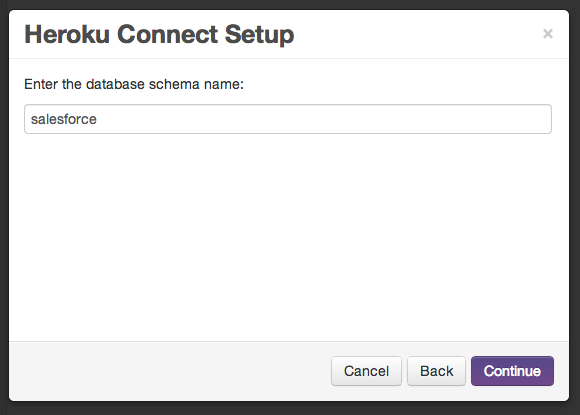
Click Continue and the schema will be created in your PostgreSQL database.
Salesforce Data
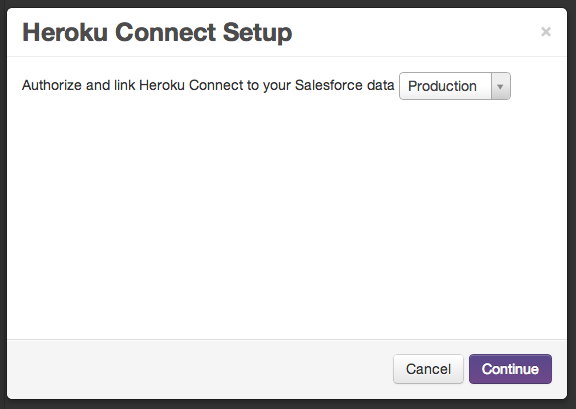
You’ll then be asked which database to connect to on the Salesforce side, we’ll use Development.
Login to Salesforce
At that point you’ll get redirected to a Salesforce authentication page. Login with your Salesforce account and agree to the access requests.
Back to Connect
After logging in successfully you’ll return to the Connect interface and be ready to setup your data sync.
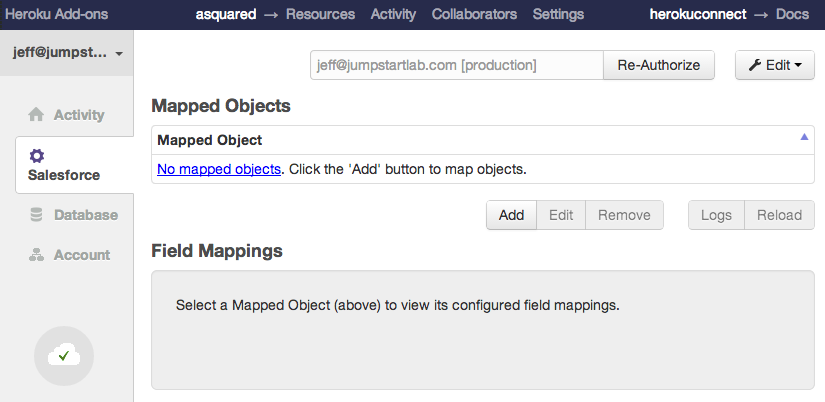
Mapping Objects
Connect is installed and ready to go, but we’ve now got to think about what data we want from Salesforce.
Account Data
For this example we’re going to start small, just accessing the built-in Account data on the Salesforce side. We want just the name and accountNumber columns synching from Salesforce to our application.
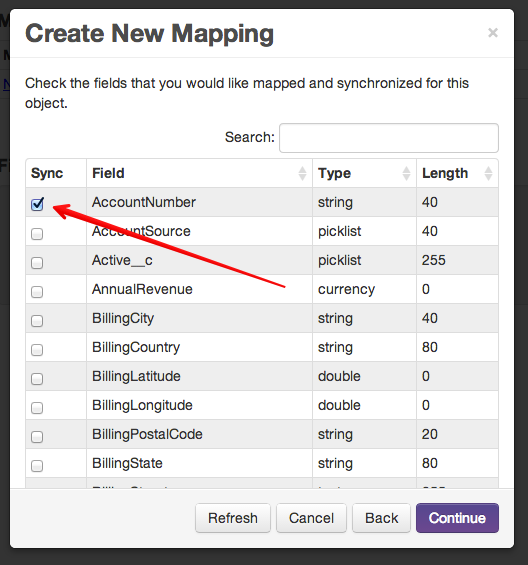
Create the Mapping
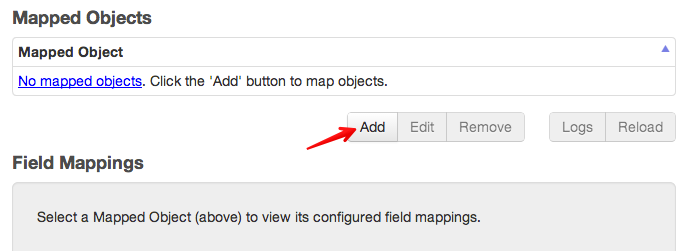
On the Salesforce tab of Connect we:
- Click the
Addbutton
- Select
Accountand click Continue
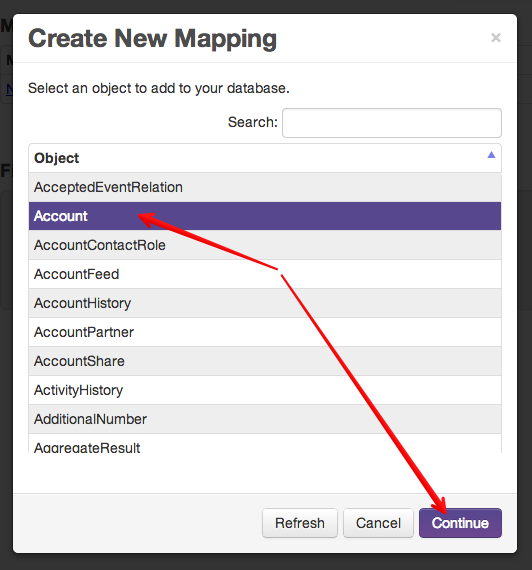
- Check AccountNumber and Name boxes then Continue
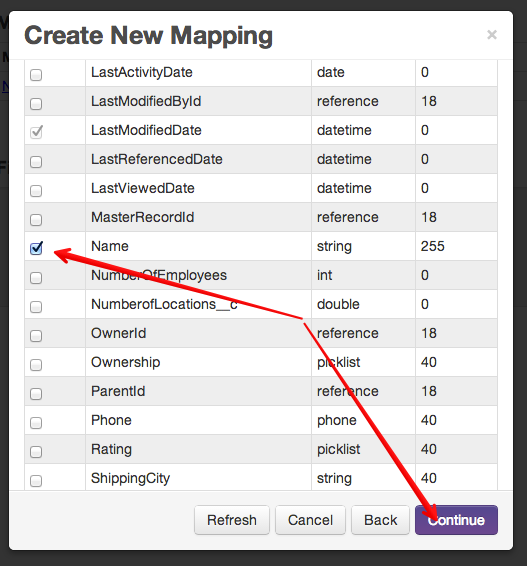
- See the actions to be taken and click Continue
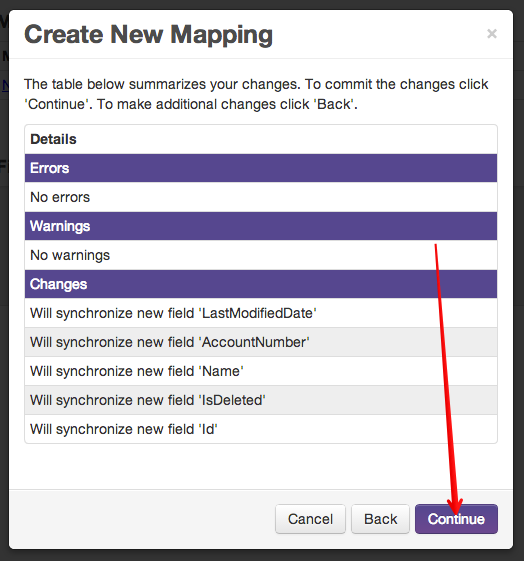
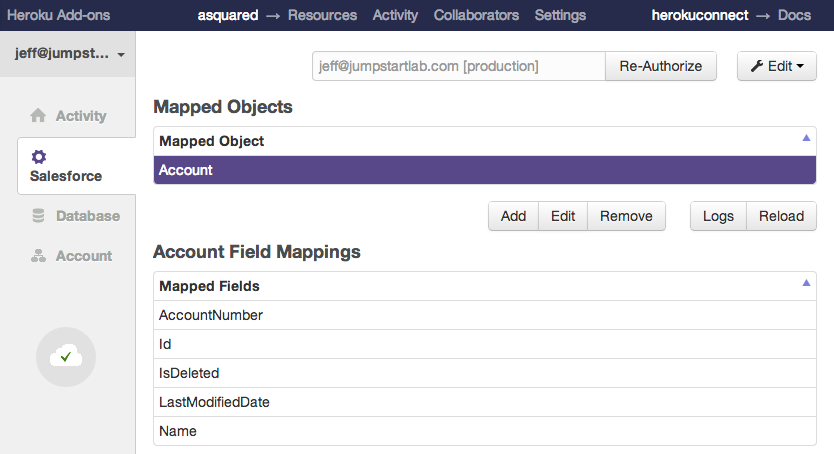
- Notice the cloud sync icon spinning on the left
- See the sync icon change to a green check like this:
Inspecting the Data
To see what happened in our database, let’s dive into Postgres:
Terminal
$
| |
Normal Data
We can see our existing companies in the Company table:
Terminal
|
Nothing has happened there.
Synched Data
Let’s take a look at the data from Salesforce:
Terminal
|
What happened? Remember that, during setup, we chose to put the synced data under a schema (or namespace) named salesforce. So we write our query…
Terminal
|
There’s our starter data from Salesforce!
Changing the Application
Let’s modify the sample application to pull company data from the salesforce.Account table instead of Company.
app/models/Company.java
We open the Company model and find a line like this towards the top:
1
| |
You can see that the SQL queries in the list and count methods epend on this variable for the table name. Amazing how that works out in sample projects!
We change it to use the Salesforce schema and table:
1
| |
Deploying
Now we commit and push that code:
Terminal
$ $ $ | |
Seeing Results
Refresh the /companies listing in your browser and you should now see the sample Account data from Salesforce.
Changing Salesforce Data
Now, through the Salesforce interface, add another Account.
- Click the Accounts Tab
- On the left side, click Create New then Account
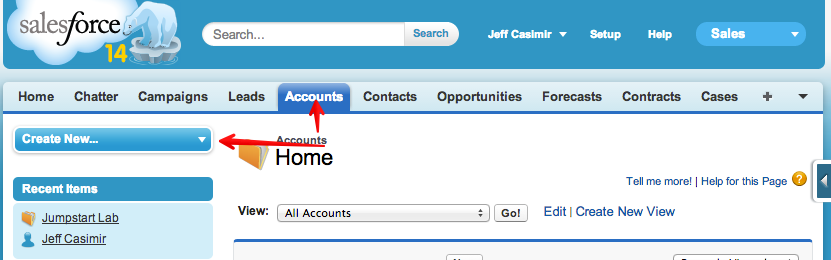
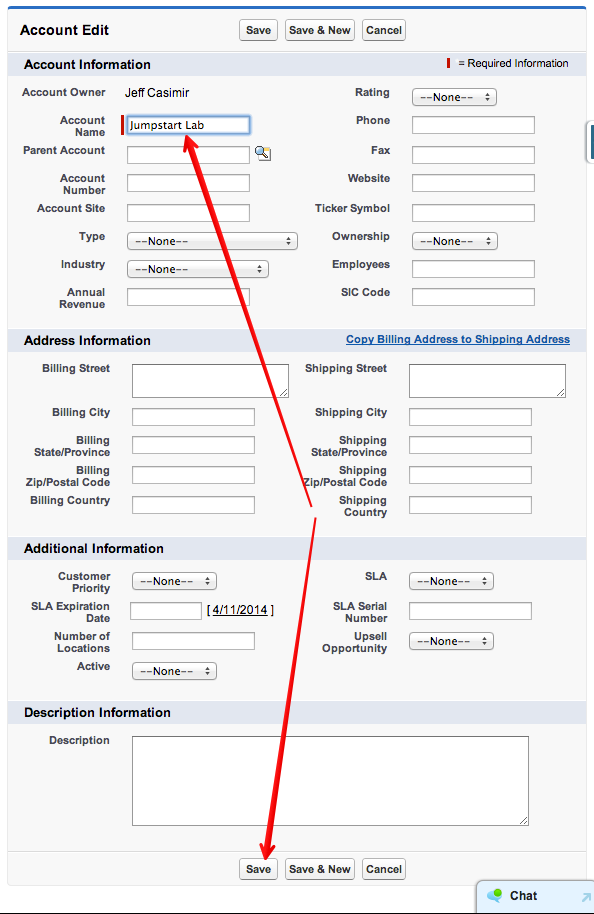
- Add an Account Name
- Click Save
Seeing the Results
Then, to see the results:
- Click the Accounts Tab
- Change the View drop-down to All Accounts
- Click Go
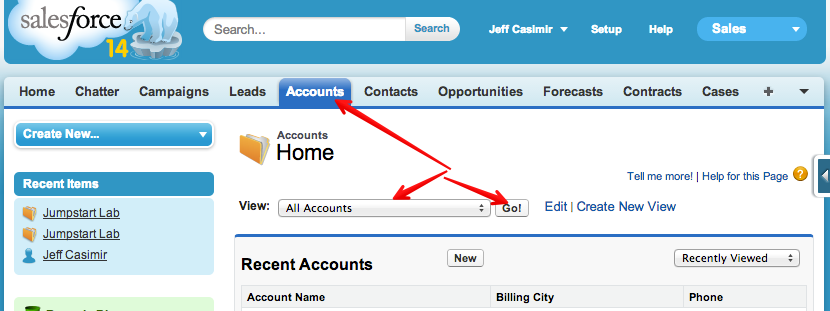
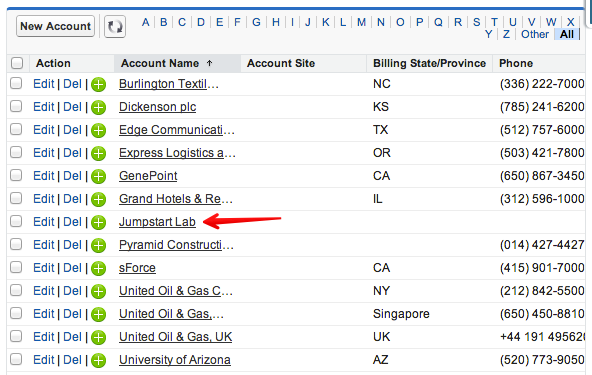
- See the company you just created in the listing
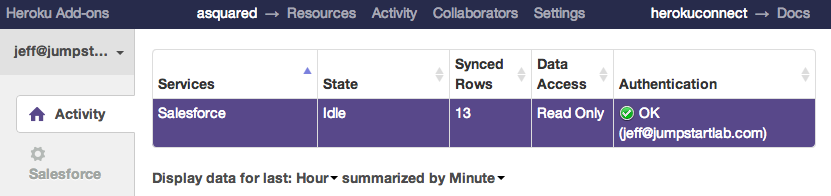
Effects in Connect
Return to the Heroku Connect interface, click the Activity tab and, after a few minutes, you should see the Synched Rows increase. The starter data has 12 rows, so if you created one account it should now say 13.
Effects in the App
And now for the big moment. Refresh the /companies page for your app and you should see the company you created show up!
Writing to Salesforce
Reading data from Salesforce is pretty useful, but in many situations you’ll want to write data.
Setting Connect for Read/Write
By default Connect is only setup to read. To enable Read/Write within Connect:
- Click the Salesforce tab
- Click the Edit button in the top right, then Read/Write
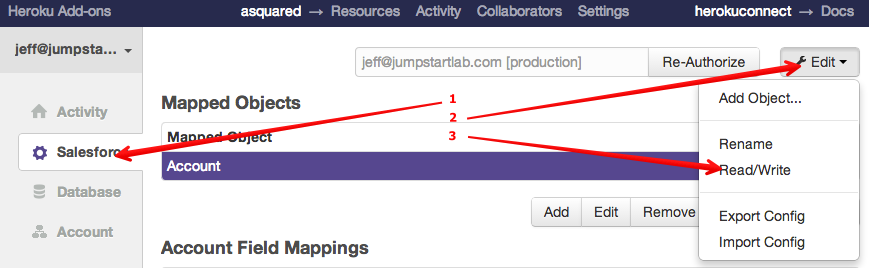
- Click Ok to the scary warning box

Writing Data with psql
Let’s write data directly to our production database using psql:
Terminal
$ | |
Results
First, we can refresh our application and the new data should show up instantly.
Then, refresh the page on Salesforce and the new data should appear. Tada!
Next Steps
Connect will be released to the general public later this year, then you can create amazing customer-facing applications on the Heroku platform backed by your Salesforce data.
Resources
- Heroku Connect on Dev Center
